

HomeWhisk earns commission from qualifying purchases made through links on this page. We research picks from specifications and owner reviews; we do not test products ourselves.
TL;DR — For most baking, line with parchment paper (non-stick, disposable, browns well) or a reusable silicone mat (eco-friendly, best for cookies); use foil only for high-heat roasting or easy cleanup, not delicate baking. The HomeWhisk team compiled this from baking guidance and aggregated feedback. Lining prevents sticking, makes cleanup instant, and promotes even browning — and choosing the right liner for the job is the whole trick.
The HomeWhisk editorial team researches kitchen equipment by analyzing manufacturer specifications, baking guidance, and aggregated user reviews from major retailers and cooking communities. This guide reflects established baking principles, not personal testing.

Lining a baking sheet is a small step that prevents sticking, saves scrubbing, and improves results — but which liner you choose (parchment, silicone, or foil) changes the outcome. Here’s how and when to use each. For choosing the sheet itself, see our best baking sheets guide.
Pros & Cons
Pros
- Reusable construction reduces the need for disposable parchment or foil.
- The non-stick surface supports easier release for gooey and sticky foods.
- The liner is made in the USA and inspected at the manufacturer's Dallas facility.
- Its odor- and flavor-resistant surface allows cookies and savory foods to share the same liner.
Cons
- It must be hand washed with warm, soapy water rather than placed in a dishwasher.
- The liner is limited to temperatures up to 450°F and must be kept away from flames.
Details
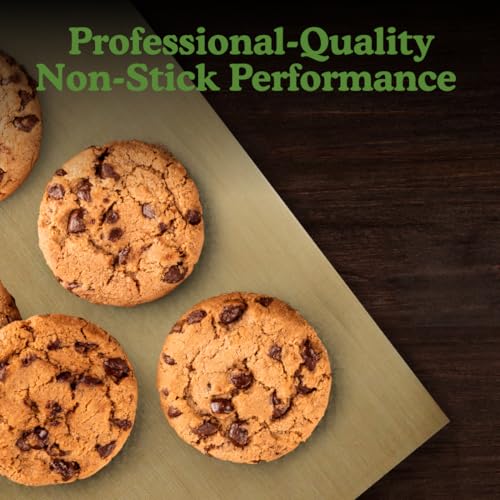
This reusable non-stick liner keeps sticky, cheesy, and oily foods from adhering to baking sheets, reducing scrubbing after cookies, pizza, wings, candy, or fish.
Food virtually slides off, while the odor- and flavor-resistant surface prevents savory foods from affecting later batches of cookies.
The 17 x 13 inch sheet can be cut for smaller ovens. The listing does not specify material or weight, but it is reusable and rated to 450°F.
Hand washing and flat drying are required, and the liner must stay away from flames.
Best for home bakers who want easier cleanup and a reusable liner for varied foods.
Cooking Tips
Place the liner on a baking sheet before adding cookies, candy, pizza, wings, or fish. Keep it within the 450°F temperature limit and away from flames.
For toaster ovens or microwaves, cut the 17 x 13 inch sheet to fit the cooking surface without extending beyond the edges.
After cooking, hand wash with warm, soapy water, rinse thoroughly, and lay flat to dry.

Pros & Cons
Pros
- Sized at 11-5/8 by 16-1/2 inches to drop straight onto a standard half sheet pan with a 1 inch border.
- The mesh doubles as a steaming liner for dumplings and buns, which a solid silicone mat cannot do.
- Food grade silicone coated fiberglass stays non stick without oil or spray.
Cons
- It is not rigid and has no metal support, so it must sit on a rack or pan and can never touch an open flame or broiler element.
- Drips and small crumbs fall through the mesh onto the pan below, so you still need a tray underneath for anything greasy.
Details
An open mesh oven liner that fixes the pale, soggy bottoms you get when dough bakes flat against a solid pan or silicone mat.
The 1x1mm perforations let heat and steam pass through, so baguette and ciabatta bases crisp evenly while eclair shells hold their shape.
Silicone coated fiberglass on both faces, 29.5 x 42cm with a 1 inch red border, thin and flexible enough to roll for storage and trim to size.
It has no structural support and cannot go over open fire, so it always needs a rack or sheet pan beneath it.
Best for home bakers making European style breads, choux pastry, or steamed buns on a half sheet pan.
Cooking Tips
Set the mesh on a wire rack inside your half sheet pan for maximum airflow under bread. Placing it flat on the pan still vents steam but browns the base more gently.
For steaming dumplings and buns, cut a piece to fit your basket. The mesh stops dough sticking to bamboo without blocking steam like paper liners do.
Keep it under 250 degrees Celsius and away from the broiler. Rinse with water right after use while residue is still soft, then air dry before rolling for storage.

Pros & Cons
Pros
- Made from food grade pulp with no fluorescent agents, so nothing questionable sits under your food at high heat.
- The nonstick surface releases eggs, breaded chicken, and melted cheese cleanly instead of tearing on removal.
- Perforations are sized and placed for air fryer airflow rather than punched at random, protecting texture.
- One hundred sheets covers months of regular use and doubles as steamer and oven liner.
Cons
- The 9-inch size only suits baskets measured at that diameter, so you need to check your inner basket before ordering.
- They must go in after preheating and under enough food weight, or loose sheets can lift toward the heating element.
Details
A 100-pack of pre-cut round parchment liners that keep grease, marinade, and melted cheese off your air fryer basket so cleanup is one lift instead of a scrub.
The perforations are spaced for air fryer circulation, so wings and fries still brown underneath rather than sitting in steam. Heat tolerance runs to 450 degrees Fahrenheit for high-temperature cooking.
Built from 100 percent food grade pulp with no fluorescent agents and a nonstick surface coating. The 9-inch round shape drops into standard round baskets and also lines steamers, ovens, and microwaves.
Fit is the catch: measure your inner basket first, because a 9-inch round will not seat properly in a smaller or square basket.
Best for air fryer owners cooking sticky, saucy, or breaded food often who want the basket coating to last.
Best Uses
Use them for the messiest jobs first: wings, bacon, marinated chicken thighs, breaded fish, and anything with cheese that welds itself to basket mesh.
Preheat the air fryer empty, then add the liner and food together so the sheet is weighted down and cannot lift into the element.
Outside the fryer, they line bamboo and metal steamers for dumplings, cover microwave plates, and sit under cookies on a baking sheet.
Parchment Paper: The All-Purpose Default
Parchment paper is the go-to liner for most baking, and for good reason — it’s the versatile default.
What it does: parchment is a silicone-coated, heat-resistant paper that’s naturally non-stick. Food releases cleanly, cleanup is instant (just toss the sheet), and it promotes even browning without over-darkening the bottoms. It works for cookies, roasted vegetables, sheet-pan meals, and lining cake pans.
How to line with it: 1. Tear or cut a piece to fit your sheet — it should cover the bottom, and a little up the sides is fine. 2. If it curls (from the roll), crumple it into a ball and smooth it out, or press it down; a dab of oil or a few drops of water under the corners holds it flat. 3. For cake pans, trace the pan bottom on the parchment and cut to size for a perfect round.
Heat limit: parchment is rated to about 420-450°F (check the box). Above that, it can brown, scorch, or become brittle — so for very high-heat roasting or broiling, use foil instead.
Bleached vs unbleached: both work identically for baking; unbleached is just less processed. Either is fine.
Not the same as wax paper: never use wax paper in the oven — the wax coating melts and can smoke or catch. Wax paper is only for cold, no-heat uses. Parchment is the oven-safe one.
Parchment is the right choice for the large majority of baking — non-stick, browns well, and disposable for zero cleanup.
Silicone Baking Mats: The Reusable Choice
Silicone mats (like the well-known Silpat brand) are the reusable alternative to parchment, with specific strengths.
What they do: a silicone mat is a flexible, non-stick, reusable sheet you lay on the baking pan. Nothing sticks, cleanup is a wipe or rinse, and one mat replaces hundreds of parchment sheets — eco-friendly and economical over time. They’re especially loved for cookies, where they promote even baking and prevent spreading-and-sticking.
Best uses: cookies (the classic use — even browning, no sticking), pastries, and anything delicate. The mat’s slight cushioning gives gentle, even bottoms — some bakers find cookies brown a touch less on the bottom than on bare parchment, which can be a plus for soft cookies or a minus if you want crisp bottoms.
How to use: just lay it flat on the sheet — no cutting or greasing. After use, cool, wash with soapy water (don’t fold or cut it, which damages it), and store flat or loosely rolled.
Limits: silicone mats have a heat rating (typically around 480°F) — check yours. They’re not ideal for foods you want extra-crisp on the bottom or for very high-heat roasting. They also don’t work for wrapping or lining tall pans the way parchment does.
Cost trade-off: higher upfront cost than a roll of parchment, but reusable for years, so cheaper long-term for frequent bakers.
Silicone mats are the choice for regular cookie bakers and anyone wanting to cut down on disposable parchment. Many bakers keep both — mats for cookies, parchment for everything else.
Aluminum Foil: For Roasting and Cleanup, Not Delicate Baking
Foil has its place, but it’s the wrong choice for a lot of baking — knowing when to use it matters.
Where foil shines: high-heat roasting (vegetables, meats) where parchment’s heat limit is a concern, catching drips and messes for easy cleanup, and lining pans for sticky, saucy foods where you’ll toss the foil. It tolerates high oven heat and the broiler, which parchment can’t.
The catch — foil isn’t non-stick: food sticks to plain foil, so for baking you usually need to grease it, or use non-stick foil (one side coated). This is why foil is worse than parchment or silicone for cookies and delicate items, which stick and tear.
Even-browning issue: foil is reflective and conducts heat differently, so it can cause uneven browning and sometimes over-browns the bottoms of baked goods where they contact the foil. For cookies and cakes, this is a drawback.
Acidic-food caution: foil reacts with acidic foods (tomatoes, citrus) over long cooking, which can impart a metallic taste and pit the foil. Use parchment or a barrier for acidic dishes.
The rule: use foil for high-heat roasting, drip-catching, and easy cleanup of messy foods — not for cookies, pastries, or delicate baking, where parchment or silicone give better, non-stick, even results. For roasting on your best baking sheets, foil is handy; for baking, reach for parchment.
Frequently Asked Questions
Should I use parchment paper or a silicone baking mat?
Both are excellent non-stick liners; choose by use. Parchment is disposable (instant cleanup), versatile for cookies, roasting, and lining pans, and browns well — the all-purpose default. Silicone mats are reusable (eco-friendly and economical long-term), especially good for cookies with even, gentle bottoms, but cost more upfront and suit delicate baking better than high-heat crisping. Many bakers keep both: mats for regular cookie baking, parchment for everything else and for jobs where they’ll toss the liner.
Can I use aluminum foil instead of parchment paper for baking?
For delicate baking, not ideally. Foil isn’t non-stick, so cookies and pastries stick and tear unless you grease it or use non-stick foil, and its reflective surface can cause uneven or over-browned bottoms. Foil is better for high-heat roasting (beyond parchment’s heat limit), catching drips, and easy cleanup of messy foods. For cookies, cakes, and delicate items, use parchment or a silicone mat instead. Use foil for roasting and cleanup, not delicate baking.
What temperature can parchment paper handle?
Most parchment paper is rated to about 420-450°F — check your box for the exact limit. Below that, it’s safe and won’t burn. Above it, parchment can brown, scorch, become brittle, or smoke, so for very high-heat roasting or broiling, switch to aluminum foil, which tolerates higher heat. For normal baking (cookies, cakes, most roasting under 425°F), parchment is perfectly safe and the better non-stick choice.
Is wax paper the same as parchment paper?
No, and this matters. Parchment is silicone-coated, heat-resistant, and oven-safe. Wax paper is coated in wax that melts and can smoke or catch fire in the oven — it’s only for cold, no-heat uses like wrapping food, separating layers, or countertop prep. Never use wax paper in the oven. When a recipe says to line a baking sheet for baking, it always means parchment (or a silicone mat), never wax paper.
Do I need to grease parchment paper or a silicone mat?
No. Both parchment paper and silicone mats are naturally non-stick, so greasing is unnecessary and just adds fat — food releases cleanly from either. This is a key advantage over foil, which does need greasing. Just lay the parchment or mat on the sheet and add your food directly. The only exception is certain sticky candies or caramels, where a light coat can help even on parchment, but for normal baking, no greasing is needed.
How do I keep parchment paper from curling up?
Parchment curls because it comes off a roll. To flatten it: crumple the sheet into a ball and smooth it back out (this breaks the curl), or press it into the pan and weigh down the corners. A few drops of water or a dab of oil under the corners makes it stick flat to the pan. Pre-cut flat parchment sheets (sold in packs) don’t curl at all and are convenient for frequent bakers. Cutting to fit the pan also helps it lie flat.
Related buying guides: best kitchen scale, best mixing bowls and best food storage containers.
The Bottom Line
Lining a baking sheet prevents sticking, makes cleanup instant, and improves browning — and choosing the right liner is the trick. Use parchment paper as the all-purpose default (non-stick, disposable, browns well, up to ~450°F), a silicone mat for reusable, eco-friendly cookie baking with gentle even bottoms, and foil only for high-heat roasting, drip-catching, and messy-food cleanup — not delicate baking, since it’s not non-stick and browns unevenly. Never use wax paper in the oven. With the right liner on good best baking sheets, baking is cleaner and more reliable. See our best dutch oven for bread baking guide for more baking gear.



Write Your Review
No reviews yet. Be the first to share your experience!