

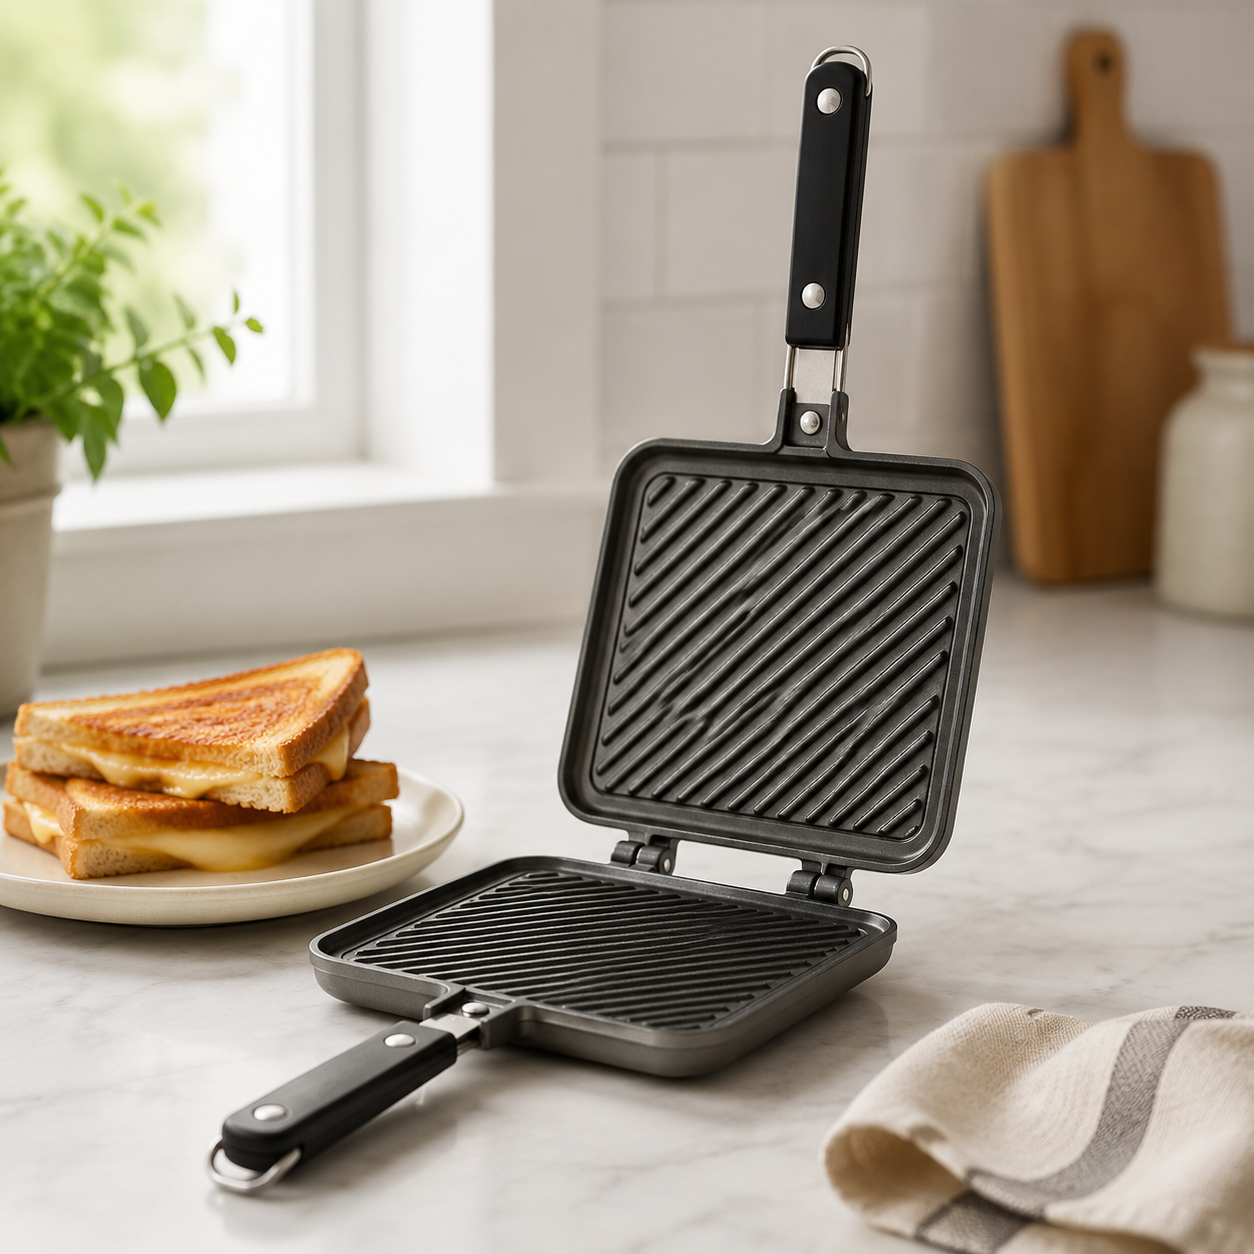
TL;DR — A good answer to sandwich toaster press starts with real kitchen habits, not a perfect spec sheet. Most readers need a clear way to avoid the wrong tool, not another list of features. When this turns into a purchase decision, compare best air fryer, best blender, and best instant pot before narrowing your shortlist.
The HomeWhisk approach is research-first: compare construction, usability, cleaning, and long-term complaints before recommending a direction. For appliance topics, we pay close attention to capacity, controls, cleanup, storage, reliability complaints, and whether the machine saves enough effort to justify the space.
Pros & Cons
Pros
- Fast-heating element delivers evenly toasted sandwiches without hot spots, based on the manufacturer's heat-distribution design.
- Compact, lightweight build makes it practical for dorm rooms and small apartments where counter real estate is limited.
- Non-stick coating prevents bread from tearing during removal, which matters most for softer sandwich styles like brioche or sourdough.
- Vertical upright storage means the unit does not need to stay on the counter between uses.
Cons
- Plate size is fixed to a standard sandwich footprint, so thicker hoagies or oversized bread slices will not fit or close properly.
- Non-removable plates mean cleaning requires careful hand-wiping rather than a dishwasher run, which can be slower with melted cheese buildup.
Details
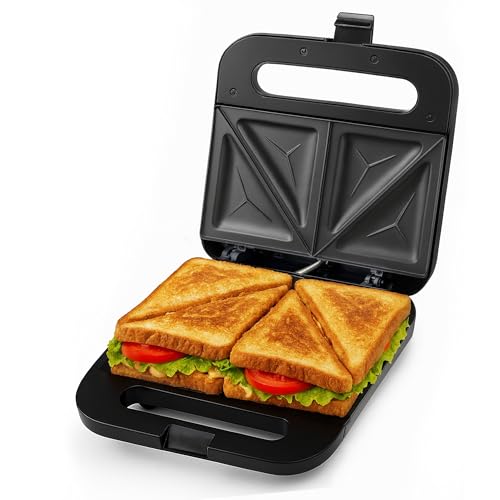
The OVENTE GPS401B is an electric sandwich press that solves the slow-morning problem by toasting and pressing sandwiches, omelets, and French toast in minutes on a single compact appliance.
Its fast-heating stainless steel element distributes heat evenly across both non-stick plates, preventing the uneven browning that plagues cheaper sandwich makers.
Built with heat-resistant stainless steel and a cool-touch handle, the unit is lightweight enough to move easily but stable enough on anti-skid feet during pressing.
Plates are non-removable, so cleanup relies on wiping rather than soaking — a minor inconvenience for dishes involving melted fillings.
Best for college students, small-apartment dwellers, or minimalist home cooks who want one affordable tool that handles breakfast and snack prep without taking up counter space.
How to Use
Plug in the unit and wait for the preheat indicator light to signal it has reached cooking temperature before placing any food on the plates.
Lay your sandwich, omelet, or French toast on the bottom plate, close the lid, and apply light downward pressure through the cool-touch handle to ensure full plate contact.
Once the indicator light confirms the unit is powered off and plates have cooled, wipe both surfaces with a damp cloth to clear residue before storing the maker upright.
Save $15.04
Pros & Cons
Pros
- The 180-degree hinge expands the appliance from a sandwich press into a contact grill.
- The four-slice capacity handles two large paninis or four sandwiches in one batch.
- The non-stick plates and removable drip tray make post-meal cleanup more manageable.
- The stainless steel surface and UL approval support regular kitchen use.
Cons
- The product data does not list adjustable temperature controls, which may limit cooking precision.
- The compact cooking area may be restrictive for unusually large foods despite the flexible hinge.
Details
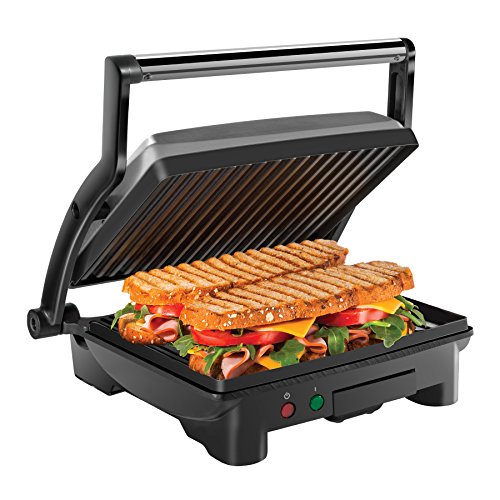
The Chefman RJ02-180-4 solves the need for quick sandwiches and small-batch grilling without requiring a separate countertop appliance.
Its four-slice surface handles two large paninis, while the floating hinge accommodates different sandwich thicknesses and the 180-degree opening supports flat grilling.
The stainless steel exterior, compact footprint, non-stick plates, tilt-up feet, and removable drip tray suit frequent use where storage and cleanup space are limited.
Temperature adjustment is not listed, so buyers seeking precise heat control should consider another model.
Best for small households, dorm residents, office kitchens, and anyone wanting one compact appliance for sandwiches and basic grilling.
How to Use
Place sandwiches on the non-stick plates, close the floating hinge, and cook until the bread reaches your preferred level of crispness. Cooking spray is not required.
For burgers, steaks, vegetables, or other foods, open the press 180 degrees to use both plates as a flat grill.
After cooking, use the tilt-up feet and removable drip tray to direct and collect grease before cleaning the coated plates.

Pros & Cons
Pros
- Five distinct cooking modes in one footprint covers grilled cheese, hamburgers, panini, sausages, and pancakes without switching appliances.
- Griddle mode temperature range of 200°F to 425°F gives meaningful control for delicate items like eggs alongside high-heat searing.
- Dishwasher-safe removable plates and drip tray make cleanup a practical daily habit rather than a chore.
- PFAS-free nonstick coating addresses a common concern buyers have with older nonstick surfaces.
Cons
- At $115, it costs more than single-function panini presses, so buyers who only make sandwiches may not recoup the versatility.
- No customer reviews are currently available to validate real-world durability claims beyond manufacturer specifications.
Details
The Cuisinart GR-4NNAS is a countertop appliance that replaces a contact grill, panini press, flat griddle, and combination grill in one unit for households with limited storage.
Dual independent temperature controls are the standout feature: grill mode adjusts from warm to sear, while griddle mode offers a precise 200°F to 425°F range for consistent results across food types.
Cooking plates are PFAS-free nonstick and fully removable. The unit is stainless steel exterior with a compact countertop footprint suited for standard kitchen setups.
With no published reviews yet, long-term nonstick durability under daily use remains unverified outside the manufacturer’s 3-year warranty coverage.
Best for households that cook a wide variety of meals and want one appliance to handle grilling, pressing, and griddling without dedicated single-use tools.
How to Use
Open the unit flat for full grill or griddle mode, or close it for contact grilling and panini pressing. The hinge adjusts to accommodate thickness, from thin sandwiches to thicker burgers.
Set temperature using the appropriate control for your mode. Griddle mode needs a preheat of several minutes before adding food; grill mode reaches searing heat faster for proteins.
After cooking, unplug and let plates cool before removing them. Both plates and the drip tray are dishwasher-safe, so cleanup requires no hand scrubbing under normal use.

Save $2.20
Pros & Cons
Pros
- 750W power provides consistent heat for paninis, grilled sandwiches, meats, and vegetables.
- Raised grill plates add sear marks and help drain excess fat.
- Non-stick plates support quick food release and easier cleanup.
- The cool-touch handle and indicator lights make operation more convenient.
Cons
- The 8.46 by 4.92-inch plates are limited to smaller portions and two slices.
- The product data does not specify its weight, so portability cannot be assessed.
Details
The OSTBA Panini Press is a compact 2-slice grill for making toasted sandwiches without using a skillet or full-size grill.
Its 750W heating element warms quickly, while raised ridges create sear marks and let excess fat drain from meats and vegetables.
Non-stick plates measure 8.46 by 4.92 inches, and the cool-touch handle, indicator lights, and cord wrap support daily convenience.
The compact plates limit serving size, so it is better suited to individual portions than large family meals.
Best for small households and cooks who want quick countertop paninis with easy cleanup.
How to Use
Place the press on a stable countertop, connect the cord, and wait for the heating indicator to show it is ready.
Add sandwiches, meats, or vegetables within the plate area, then close the cool-touch handle and cook until toasted or seared.
Remove food with non-metal utensils and wipe the non-stick plates after they cool.

Pros & Cons
Pros
- The floating lid accommodates varying sandwich heights without manual repositioning, making it practical for stuffed or layered sandwiches.
- Top and bottom nonstick grids heat simultaneously, producing evenly browned results on both sides in a single pass.
- The lid lock adds a second cooking mode, extending the press beyond sandwiches to open-face items and flatbreads.
- Upright storage design means it occupies minimal cabinet space compared to flat-storing models of similar size.
Cons
- The 8 x 10-inch grid fits one standard sandwich or one quesadilla at a time, making it slow for households cooking multiple portions.
- There is no adjustable temperature control — heat output is fixed at 1400 watts, which limits precision for delicate or low-heat recipes.
Details
The Hamilton Beach 25460MNA is a countertop panini press that solves uneven browning by applying heat from both sides simultaneously through nonstick top and bottom grids.
Its café-style floating lid self-levels to match sandwich thickness, ensuring even pressure whether you’re pressing a thin wrap or a thick stacked sandwich.
Built from chrome-finished housing with nonstick aluminum grids, it measures 11.6 x 12.6 x 4.5 inches and stores upright to reduce counter footprint.
Fixed 1400-watt output means no temperature dial — buyers who regularly cook eggs or delicate items may find this limiting.
Best for home cooks who want a fast, low-effort way to make pressed sandwiches and grilled flatbreads without managing stovetop heat.
How to Use
Preheat the press for 6 minutes before loading food — the green ready light confirms the grids have reached cooking temperature across the full 8 x 10-inch surface.
Place your sandwich or quesadilla centered on the bottom grid, lower the floating lid, and let both grids do the work. No flipping needed; the top grid browns the upper surface simultaneously.
To use it as an open-face grill, engage the lid lock to hold it flat, then place bruschetta, pizza slices, or flatbreads directly on the lower grid for top-down radiant heat.
Why It Matters
The variables that decide the outcome — motor or heating-element power, cleaning access, and digital versus dial controls — are the ones buyers most often overlook. That is why two appliances that look alike can feel completely different in use — one saves time, the other quietly adds friction to every task. If you are shopping, our best air fryer and best blender guides are the fastest way in.
The Short Answer
The short version of sandwich toaster press: fit the appliance to your real cooking, not to a feature list. The practical takeaway is that cleaning access matters more day to day than headline features. For product picks, compare best air fryer, best blender, and best instant pot.
What To Look For
Judge a appliance by how it feels in normal use, how easy it is to clean, and whether it solves the job you bought it for. Those are the variables that decide whether it earns a spot in your kitchen or ends up unused. Ignore cosmetic upgrades until the fundamentals check out.
Who Benefits Most
This matters most for families cooking in volume, and meal-preppers batching food. If that is you, treat noise level, and cleaning access as non-negotiable. Casual users can relax the requirements and prioritize price and storage instead.
Common Misconceptions
The biggest myth is that the most expensive appliance is automatically the best for you. In reality, the right choice depends on build quality of seals, and noise level — plus your own habits. Another trap is buying by brand alone — the same maker sells both excellent and forgettable lines.
When It Is Worth Paying More
Spending up pays off when you use the appliance often enough to notice better more predictable performance every week. If it only comes out occasionally, a mid-range pick is the smarter call. Match the money to frequency of use, not marketing.
Related Product Guides
If this topic is part of a buying decision, these are the HomeWhisk guides most closely tied to it:
Frequently Asked Questions
What is the bottom line?
Match the appliance to your real habits: buy for durability if it is daily, for value and storage if it is occasional.
What gear pairs well with it?
Start with a reliable core piece, then add as needs appear. Compare best air fryer, best blender, and best instant pot for related choices.
Is a premium appliance worth it?
Only if you use it enough to notice better control, durability, or cleanup regularly. Occasional users are well served by a mid-range pick like those in best instant pot.
What matters most for sandwich toaster press?
Focus on storage bulk, speed under load, and preset controls first. Those decide real performance; the rest is secondary. Compare best air fryer and best blender for options that get the basics right.
How do I keep it in good shape?
Build descaling water-based units, and letting the motor rest between heavy loads into normal cleanup. Light, consistent care prevents motors that bog down under load far better than occasional deep effort.
The Bottom Line
For most home cooks, the best choice is the one that removes friction without adding maintenance you will ignore. Start with your use case, then cross-check best air fryer, best blender, and best instant pot.


Write Your Review
No reviews yet. Be the first to share your experience!