

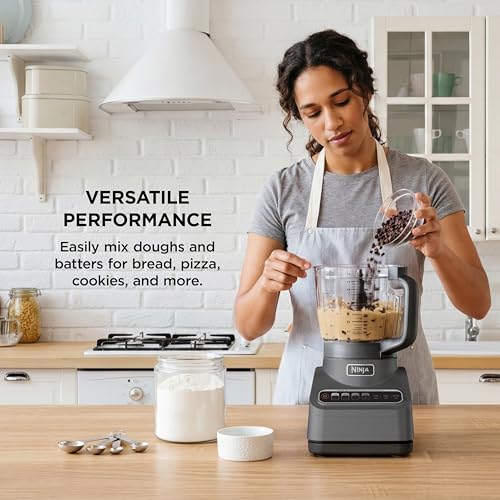
TL;DR — Fit the right tool (S-blade for chopping, puréeing, and dough; shredding/slicing discs for vegetables and cheese), don’t overfill past the max line, and pulse for control rather than running continuously. The HomeWhisk team compiled this from manufacturer guidance and aggregated owner feedback. A food processor turns fifteen minutes of knife work into thirty seconds — the whole skill is choosing the blade and using the pulse button. Here’s how to use one for chopping, slicing, shredding, puréeing, and dough.
The HomeWhisk editorial team researches kitchen equipment by analyzing manufacturer specifications, usage guidance, and aggregated user reviews from major retailers and cooking communities. This guide reflects common manufacturer operating instructions, not personal testing.
A food processor intimidates people with its blades and discs, but it’s straightforward once you know which attachment does which job. It’s a huge time-saver for prep. Here’s the complete beginner’s guide. For choosing a model, see our best food processor guide.
The Blades and Discs, Explained
Every food-processor task starts with fitting the right attachment. There are only a few, and each has a clear job.
The S-blade (sabatier/chopping blade) sits at the bottom of the bowl and is the workhorse — use it for chopping vegetables, mincing herbs and garlic, making purées and dips (hummus, pesto, nut butters), grinding nuts, blending sauces, and mixing dough. It spins fast and chops whatever’s in the bowl. This handles most tasks.
The shredding disc grates cheese, carrots, potatoes (for hash browns), cabbage (for slaw), and similar — food is fed through the top and comes out shredded. Far faster than a box grater.
The slicing disc cuts uniform slices of vegetables and fruits — cucumbers, potatoes, tomatoes, apples — as you feed them through the chute. Many are adjustable for thickness.
The dough blade (plastic, on some models) is for kneading dough; if your model doesn’t include one, the S-blade handles dough too.
The simple rule: S-blade for anything chopped, puréed, or mixed inside the bowl; discs (fed through the top chute) for slicing and shredding. Discs process food into the bowl continuously as you feed it; the S-blade works on a batch already in the bowl. Our best food processor guide notes which discs each model includes.
Setting Up Safely
Food processors have safety interlocks and sharp blades, so correct assembly matters. Here’s the sequence.
1. Place the bowl on the base and lock it (usually a twist until it clicks). It won’t run unless the bowl is locked.
2. Fit the blade or disc. For the S-blade, drop it onto the center spindle before adding food. For discs, they sit on a stem near the top. Handle blades by their plastic hub, not the sharp edges.
3. Add ingredients (for the S-blade) or leave the bowl empty (for discs, since food goes in through the chute as it runs).
4. Lock the lid. The processor has a safety interlock — it won’t start until the lid is locked into place. This prevents the blades running with the lid off.
5. Insert the feed tube pusher for disc work — always use the plastic pusher to guide food down the chute, never your fingers.
6. Plug in and run using pulse or continuous (see next section).
7. Turn off and wait for the blade to stop completely before removing the lid. Never reach in while the blade is spinning or coasting.
The interlocks make it hard to run unsafely, but the cardinal rules are: use the pusher (never fingers) in the chute, and wait for full stop before opening.
Pulse vs Continuous, and Key Techniques
Knowing when to pulse and when to run continuously is the core skill that separates good results from mush.
Pulse (short bursts) gives you control and even results. Use it for chopping vegetables (so you get an even chop instead of purée), mincing, and anything where you don’t want to over-process. Pulsing lets you check the texture between bursts and stop at the right moment. It’s the default for chopping.
Continuous run is for tasks that need sustained processing: puréeing soups and dips to smooth, making nut butter, kneading dough, and shredding/slicing through the chute (where you feed steadily while it runs). Let it run until smooth or until all the food is fed through.
Key techniques:
- Even chopping: cut food into roughly similar-sized pieces first, then pulse — huge and tiny pieces process unevenly.
- Puréeing: run continuously and scrape down the sides once or twice (with the machine off) for a uniform result.
- Shredding/slicing: feed food through the chute with gentle, steady pressure on the pusher; don’t force it.
- Dough: add liquid slowly through the feed tube while running until it forms a ball, then stop — don’t overwork.
The biggest control mistake is running continuously when you should pulse, turning what should be chopped onions into onion soup. When in doubt, pulse and check.
Capacity, Cleaning, and Getting the Most From It
A few practical habits keep results good and the machine lasting.
Don’t overfill. Every bowl has a max-fill line — exceed it and food doesn’t process evenly, and liquids can leak past the blade. For large quantities, work in batches. Liquids especially: fill well below the max, since the spinning blade pushes liquid up the sides.
Cut food to fit. Large items should be cut down before going in (for the S-blade) or trimmed to fit the feed chute (for discs). Forcing oversized pieces strains the motor and jams the blade.
Clean immediately. Rinse or wash the bowl, lid, and blades right after use, before food dries on — dried purée and dough are tough to remove. Most parts are dishwasher-safe (check your model), but hand-washing the sharp blades carefully is safer. Never submerge the motor base; wipe it with a damp cloth.
Handle blades carefully. They’re very sharp. Store them safely (some processors have blade storage), wash them individually rather than tossing them in a sink of soapy water where you can’t see them, and always grip the plastic hub.
Match tasks to the machine. A full-size processor handles big batches and dough; a mini one is great for small chopping jobs (garlic, herbs, a single dip) and takes less space. For occasional small jobs, a mini processor or even a good best blender may cover your needs — see our comparison of the two tools. Our best food processor guide covers sizing.
Frequently Asked Questions
What is the S-blade in a food processor used for?
The S-blade (the curved blade at the bottom of the bowl) is the all-purpose tool: chopping vegetables, mincing herbs and garlic, puréeing dips and sauces (hummus, pesto), grinding nuts, making nut butter, and mixing or kneading dough. It handles most food-processor tasks that happen inside the bowl. The discs (slicing and shredding) handle food fed through the top chute; the S-blade works on a batch placed in the bowl.
When should I pulse versus run continuously?
Pulse (short bursts) for control — chopping vegetables, mincing, and anything you don’t want to over-process, checking texture between pulses. Run continuously for sustained tasks — puréeing to smooth, making nut butter, kneading dough, and feeding food through the chute for slicing or shredding. The most common mistake is running continuously when you should pulse, which turns chopped ingredients into purée. When in doubt, pulse and check between bursts.
How do I use the slicing and shredding discs?
Fit the disc on its stem near the top of the bowl, lock the lid, and turn the machine on. Feed food into the chute and guide it down with the plastic pusher (never your fingers) using gentle, steady pressure. The disc slices or shreds the food into the bowl below as you feed. Cut food to fit the chute first, and don’t force it — let the disc do the work. Empty the bowl when it fills.
Can you overfill a food processor?
Yes, and it causes problems. Exceeding the bowl’s max-fill line means food processes unevenly and liquids can leak past the blade seal and out of the bowl. For large quantities, process in batches. Be especially careful with liquids (soups, sauces) — fill well below the max, because the spinning blade pushes liquid up the sides. Overfilling also strains the motor. Working in smaller batches gives better, more even results anyway.
Is a food processor the same as a blender?
No — they’re optimized for different tasks. A food processor excels at dry and thick work: chopping, slicing, shredding, and dough, with a wide bowl and interchangeable blades. A blender excels at liquids: smoothies, soups, and drinks, using a tall jar and blades that create a vortex. A processor makes chunky-to-thick results and handles solids; a blender makes smooth liquids. Many kitchens want both. See our comparison of blender versus food processor for details.
How do I clean a food processor safely?
Wash the bowl, lid, and blades right after use before food dries on. Most parts are dishwasher-safe (check your model), but the blades are very sharp, so hand-wash them individually with care rather than dropping them into a sink of soapy water where you can’t see them. Grip blades by the plastic hub. Never submerge the motor base — wipe it with a damp cloth. Prompt cleaning prevents dried purée and dough from becoming hard to remove.
Related buying guides: best air fryer, best instant pot and best toaster oven.
The Bottom Line
A food processor is easy to use once you know the parts: the S-blade for chopping, puréeing, and dough inside the bowl; slicing and shredding discs for food fed through the top chute. Pulse for control when chopping, run continuously for puréeing and kneading, and always use the pusher (never fingers) in the feed tube. Don’t overfill past the max line, cut food to fit, and clean the sharp blades carefully right after use. Used this way, it turns tedious prep into seconds. For occasional small jobs a mini processor or a best blender may suffice; see our best food processor guide to choose.

Save $20.00
Pros & Cons
Pros
- Auto-iQ presets deliver consistent results for common tasks like salsa and pie dough without needing to manually pulse or adjust speed.
- The 9-cup bowl capacity handles family-sized portions in one batch, reducing the need to process ingredients in multiple rounds.
- Stainless steel blades stay sharp through repeated use and handle both delicate herbs and hard vegetables without dulling quickly.
Cons
- The 9-cup bowl takes up significant counter and cabinet space, which may be too large for small kitchens or single-person households.
- The motor is louder than compact models during operation, especially when processing hard ingredients like nuts or ice.
Details
The Ninja BN601 is a 1000-peak-watt food processor built to replace manual chopping, slicing, and kneading for home cooks who want faster meal prep without sacrificing consistency.
The Auto-iQ Technology uses timed pulsing patterns across four preset programs, so chopping onions, slicing carrots, pureeing soup, or mixing pizza dough happens with one button press. The 1000-watt motor maintains speed under load, which means it processes fibrous vegetables like kale and sticky dough without bogging down.
The 9-cup BPA-free bowl, stainless steel slicing disc, chopping blade, and dough blade are all dishwasher safe. The unit measures approximately 10 inches wide and 15 inches tall with the feed chute attached, requiring dedicated counter or cabinet space.
The feed chute is narrower than some competitors, so larger vegetables like whole potatoes need to be halved before slicing. The motor noise level is typical for this wattage class but noticeably louder than lower-powered compact processors.
Best for home cooks who regularly meal prep for families, bake from scratch, or want to eliminate repetitive knife work without learning manual pulse timing.
How to Use
Lock the bowl onto the base, insert the blade for your task (chopping blade for vegetables, slicing disc for uniform cuts, dough blade for mixing), then add ingredients. For Auto-iQ presets, press the corresponding program button and the processor runs through the timed cycle automatically.
When using the feed chute for slicing, cut larger vegetables to fit the chute diameter and use the pusher to guide ingredients onto the spinning disc. Avoid overloading the bowl past the max-fill line, as this reduces chopping efficiency and can cause uneven results.
For dough, add dry ingredients first, pulse to combine, then slowly pour liquid through the feed chute while the dough blade runs until the mixture pulls away from the bowl sides. This typically takes 30 to 60 seconds for most bread and pizza doughs.

Save $90.00
Pros & Cons
Pros
- The 4mm slicing disc and shredding disc produce uniform cuts for even cooking and professional presentation in salads and gratins.
- Buyers report the suction-cup feet keep the processor stable during heavy kneading tasks, unlike lighter models that walk across counters.
- The on/pulse buttons give precise control for coarse chopping nuts or making chunky salsas without over-processing into mush.
Cons
- The slicing and shredding discs are fixed at one thickness with no adjustment options, limiting versatility for recipes that need paper-thin or thick-cut slices.
- The 14-cup bowl requires significant cabinet space (10 inches wide, 15 inches tall when assembled), making storage difficult in small kitchens.
Details
The Cuisinart DFP-14BCNY is a 14-cup food processor designed to eliminate repetitive knife work and reduce meal prep time for families and batch cooks.
The 720-watt motor maintains consistent speed under load when kneading dough or shredding hard cheeses. The extra-large feed tube fits whole fruits and vegetables, removing the pre-cutting step that adds minutes to every recipe.
Brushed stainless steel housing resists kitchen wear better than plastic models. The assembled unit weighs 18 pounds and stands 15 inches tall, requiring dedicated counter or cabinet space.
The slicing and shredding discs are not adjustable, so recipes requiring paper-thin cuts or thick slices need a mandoline or knife as backup.
Best for home cooks who prepare meals for 4+ people regularly or batch-cook for the week ahead.
How to Use
Lock the work bowl onto the base by aligning the handle to the right and twisting counterclockwise until it clicks. Insert the blade or disc onto the center stem before adding ingredients.
Use the pulse button for controlled chopping when making salsa, pesto, or coarsely chopped nuts. Hold for 1-second bursts and check texture between pulses to avoid over-processing.
For slicing or shredding, push ingredients through the feed tube with steady pressure using the included pusher. The motor automatically adjusts speed based on resistance, so avoid forcing hard vegetables that could jam the blade.

Save $20.00
Pros & Cons
Pros
- The 11-cup capacity handles family-size recipes and party prep without needing to empty the bowl mid-task.
- Multiple discs and a chopping blade cover slicing, shredding, mixing, and dough kneading in one machine.
- Dishwasher-safe parts make post-cooking cleanup fast and hands-off.
Cons
- The 11-cup bowl takes up significant counter and cabinet space, which may be tight in smaller kitchens.
- The motor is powerful but loud during operation, especially when processing hard vegetables or dough.
Details
This is a full-size electric food processor built to replace hand-chopping, slicing, and shredding for everyday meal prep and batch cooking.
The industrial-quality motor powers through dense ingredients like pizza dough and hard vegetables without stalling. The 11-cup work bowl fits a full head of cauliflower or enough shredded carrots for a week of salads.
Stainless steel blades and discs hold their edge through repeated use. The chrome base is sturdy and heavy enough to stay put during high-speed chopping. The entire unit measures roughly 15 inches tall and weighs around 12 pounds.
The feed tube opening is narrower than some newer wide-mouth models, so larger vegetables need quartering before processing.
Best for home cooks who prep multiple meals weekly and have counter or cabinet space for a full-size appliance.
How to Use
Lock the work bowl onto the base, insert the blade or disc, then lock the cover. The processor will not start unless all parts are seated correctly. Use the large pusher for whole vegetables and the small pusher for narrow items like celery.
Pulse tough ingredients like nuts or hard cheese to avoid over-processing into paste. Use continuous run for softer vegetables, doughs, and sauces. Let the motor do the work instead of pressing down hard on the pusher.
After each use, disassemble all parts and place them on the top rack of the dishwasher. Wipe the motor base with a damp cloth only, never submerge it in water.

Save $4.96
Pros & Cons
Pros
- Built-in scraper eliminates the need to stop and manually push food down, which reviewers cite as a major time-saver during batch cooking.
- All removable parts are dishwasher safe and reviewers confirm they come out clean without hand-scrubbing stuck-on residue.
- Handles tough ingredients like hard cheeses and fibrous vegetables without bogging down, according to users who process these foods weekly.
Cons
- The 10-cup bowl is not large enough for users who regularly process more than one full recipe batch at a time, requiring you to work in stages.
- Some reviewers note the pulse button requires continuous pressure rather than toggling on and off, which can be tiring during long chopping sessions.
Details
The Hamilton Beach 70730 is a 10-cup food processor designed to eliminate the scrape-down step that interrupts most food prep tasks. The built-in bowl scraper rotates with the bowl to push ingredients toward the blades continuously.
The 450-watt motor processes hard vegetables and aged cheeses without stalling. Two speeds plus pulse let you control texture: pulse for coarse chops, low for thin slices, high for smooth purees and dips.
The unit includes a stainless steel S-blade for chopping and pureeing, plus a reversible disc that slices on one side and shreds on the other. The 10-cup bowl, lid, pusher, and all blades are BPA-free plastic and metal that go in the dishwasher.
The motor base measures roughly 10 inches tall when assembled, so it fits under most cabinets but requires counter space. The pulse function needs continuous pressure, which some users find less convenient than a toggle switch.
Best for home cooks who prep vegetables, shred cheese, or make dips and sauces multiple times per week and want cleanup that takes under five minutes.
How to Use
Lock the bowl onto the base by aligning the tabs and twisting clockwise until it clicks. Insert the blade or disc onto the center shaft, then add ingredients and secure the lid the same way.
Use pulse for chopping onions, nuts, or herbs where you want visible texture. Press in short bursts and check progress every few pulses to avoid over-processing into paste.
For slicing or shredding, use the low speed and feed ingredients through the chute with the pusher. For smooth purees, dips, or sauces, run on high speed for 30 to 60 seconds until the mixture is uniform and the scraper has worked all ingredients into the blend.

Pros & Cons
Pros
- Separate bowls eliminate the need to wash between raw meat and vegetables, saving time during multi-recipe meal prep.
- Two-speed control handles delicate herbs on low and frozen nuts or tough meat on high without over-processing softer ingredients.
- Removable blades and dishwasher-safe bowls make cleanup faster than traditional food processors with fixed blade assemblies.
Cons
- Overheating protection kicks in during extended grinding sessions, requiring 3-5 minute cooldown breaks when processing large batches.
- Glass bowl adds weight and requires careful handling compared to all-plastic models, though it resists staining better than plastic.
Details
This electric food processor solves the cross-contamination problem that slows down cooks who prep both raw proteins and fresh produce in the same meal cycle.
The 450W copper motor spins bi-level blades fast enough to mince garlic in 3 seconds or grind raw chicken breast into ground meat in under 10 seconds. Two-speed control prevents over-processing delicate ingredients like fresh herbs while still powering through frozen fruit and hard nuts.
Build centers on an 8-cup borosilicate glass bowl for vegetables and an 8-cup stainless steel bowl for raw meat, both with BPA-free lids. The motor unit weighs 2.8 pounds and measures 9 x 6 x 6 inches when stored with one bowl attached.
The overheating protection system stops the motor after 60-90 seconds of continuous high-speed grinding, requiring a 3-5 minute rest before you can resume processing large batches.
Best for home cooks who prepare meals with both raw meat and fresh produce multiple times per week and want to eliminate mid-prep bowl washing.
How to Use
Lock the bowl onto the base by aligning the tabs and twisting clockwise until it clicks. Drop ingredients into the bowl in 2-cup batches for even chopping, never filling past the 6-cup line to prevent jamming.
Press and hold the top button for continuous chopping or pulse in 1-2 second bursts for coarse texture control. For ground meat, cube raw protein into 1-inch pieces first and use high speed with 8-10 one-second pulses instead of continuous grinding.
If the motor stops mid-task, unplug the unit and wait 4 minutes for the thermal protection to reset. Clean blades immediately after processing onions or garlic to prevent odor transfer between the glass and steel bowls.

Pros & Cons
Pros
- The 75 recipes span doughs, sauces, sides and mains rather than concentrating on one narrow use.
- America's Test Kitchen explains why each technique works, so the methods carry over to recipes outside the book.
- Everything is written for a standard full-size food processor, requiring no specialty attachments beyond the machine you already own.
- Softcover format is thin enough to keep next to the appliance instead of shelved across the kitchen.
Cons
- Most recipes assume a full-size processor, so a mini chopper or blender will not handle the disc-based slicing and shredding work.
- The listing includes no description, feature list, or buyer feedback, leaving you to judge it on the publisher's track record alone.
Details
Food Processor Perfection is an America’s Test Kitchen recipe collection built around a single appliance. It solves a common problem: a processor that stays in the cabinet because its owner only uses it for chopping.
The 75 recipes lean on exact pulse counts and disc work, covering pie dough in seconds, uniform potato slices for gratins, fresh breadcrumbs, pesto, hummus and home-ground burger meat.
Standard softcover cookbook format, light and thin enough to keep beside the machine. Layout follows the usual America’s Test Kitchen pattern of technique notes running alongside each recipe.
The listing carries no description, feature list, or customer feedback, so you are relying on the publisher’s reputation rather than buyer reports.
Best for owners of a full-size food processor who want tested methods instead of trial and error.
Best Uses
Start with doughs. Pie crust, biscuits and pizza dough come together in pulses, which keeps butter cold and limits gluten development better than working by hand.
Use the slicing and shredding discs for volume prep: potato gratins, coleslaw, hash browns, shredded cheese and vegetable bases that otherwise eat up knife time.
The blade handles pestos, hummus, nut butters, breadcrumbs and grinding your own meat, so one machine covers prep, sauce and main course in a single session.

Pros & Cons
Pros
- The included pair of 4-cup bowls reduces cross-use between raw meat, vegetables and sauces.
- Two speeds provide straightforward control for both soft and hard ingredients.
- The BPA-free bowls and detachable components are practical for frequent kitchen prep.
- Low-noise operation and a non-slip ring make countertop use more manageable.
Cons
- The 4-cup capacity is intended for small batches rather than large family-size processing.
- The motor unit cannot be washed under running water and must be cleaned separately.
Details
This compact electric processor chops, minces, mixes and purees small batches, reducing knife work for vegetables, meat, nuts, sauces and baby food.
Low speed handles softer fruits and vegetables, while high speed processes meat, nuts and harder ingredients in a stated 6 to 10 seconds.
It includes two BPA-free, food-grade 4-cup bowls, four S-shaped blades and a non-slip base. Product weight is not specified.
The 4-cup bowl limits batch size, and the motor housing cannot be rinsed or placed in a dishwasher.
Best for small households and meal preppers who want fast chopping with separate bowls for different ingredients.
How to Use
Add ingredients without overfilling the 4-cup bowl, secure the blade assembly and cover, then attach the motor unit before processing.
Use speed I for fruits and vegetables. Select speed II for meat, nuts and harder foods, checking texture after short processing intervals.
Unplug and remove the motor before cleaning. Rinse the detachable cover and bowl, place the blade assembly in the dishwasher if desired, and wipe the motor separately.

Pros & Cons
Pros
- Two 8-cup bowls provide useful capacity for meal prep and separate meat and vegetable processing.
- The two-speed control and upgraded S-shaped stainless steel blades support different ingredients and textures.
- The ergonomic button design improves pressing comfort and control during repeated prep.
- A stainless steel bowl, glass bowl and removable blades support flexible food preparation and cleaning.
Cons
- The glass bowl should not be exposed to liquids above 149°F because hotter water may cause shattering.
- The product data does not provide appliance dimensions or weight, so storage planning may require checking the retailer listing.
Details
The Ganiza food processor handles chopping, grinding, mixing, blending and whipping, reducing manual work when preparing meat, vegetables, nuts, fruit, salsa or guacamole.
Its 450-watt motor, two speeds and S-shaped stainless steel blades help produce small, consistent pieces quickly.
The set includes an 8-cup glass bowl and an 8-cup SUS 304 stainless steel bowl, allowing separate handling of meat and vegetables.
The glass bowl has a 149°F limit, and the product data does not list the appliance’s dimensions or weight.
Best for home cooks who want one countertop processor for varied meal-prep tasks and separate food-processing bowls.
How to Use
Place prepared ingredients in the appropriate 8-cup bowl, fit the spring-loaded blade, secure the motor unit and select one of the two speeds.
Use short presses to control texture, especially for vegetables, nuts and meat, and stop when the desired consistency is reached.
Remove the motor unit before handling the blades, then detach the removable parts for cleaning. Keep the glass bowl below 149°F.
Pros & Cons
Pros
- The auto-reversing blade eliminates the need to stop, remove, and flip blades when switching between soft herbs and hard cheese.
- The compact 3-cup capacity prevents over-processing small quantities that get lost in full-size processor bowls.
- Dishwasher-safe parts and a wipe-clean base cut cleanup time to under a minute for most tasks.
Cons
- The motor struggles with very hard items like coffee beans, which the manual warns against grinding despite the grind function.
- The plastic body feels less durable than metal housing on pricier models and may crack if dropped on tile floors.
Details
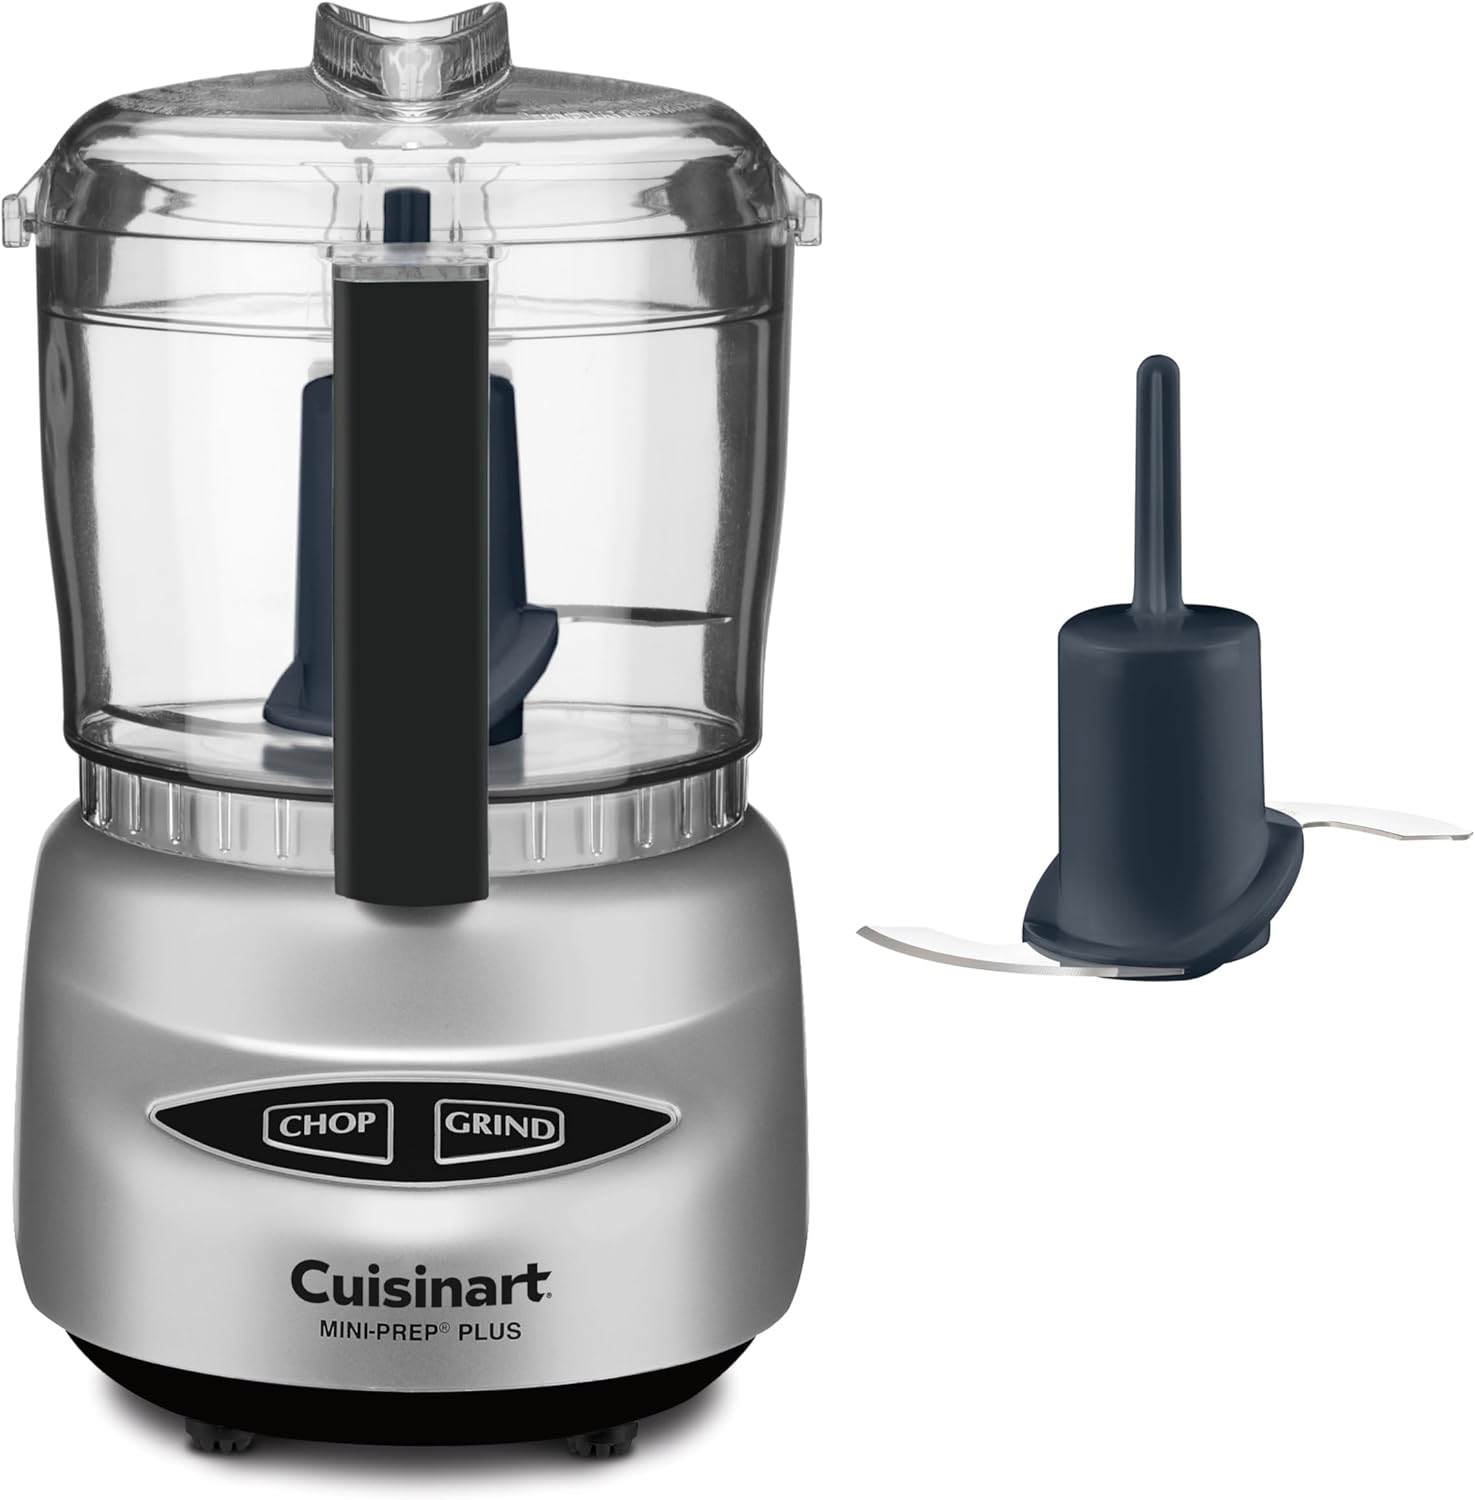
The Cuisinart Mini-Prep Plus replaces knife work for small-batch prep jobs where a full-size processor wastes counter space and creates more cleanup than the task warrants.
The 250-watt motor drives a patented reversible blade that chops in one direction and grinds in the other, controlled by two buttons on the touch pad. The chop side dices onions, herbs, and garlic in seconds. The grind side pulverizes hard cheese, nuts, and breadcrumbs using the blunt edge.
The 24-ounce work bowl with handle weighs just a few ounces with its lightweight plastic body and stands 9 inches tall. The bowl and lid fit in a dishwasher; hand wash the blade to keep edges sharp.
The motor cannot handle coffee beans or other extremely hard items despite the grind setting, and the plastic housing feels less robust than metal alternatives if durability matters more than price.
Best for home cooks who prep fresh ingredients daily in small quantities and want faster results than knife work without storing a bulky appliance.
How to Use
Lock the bowl onto the base with the handle positioned to the right. Drop ingredients in, place the lid on top, and press chop for soft foods or grind for hard items. Pulse in short bursts rather than holding the button down to control texture.
For emulsions like mayo or vinaigrette, start the motor on chop and drizzle oil through the two ports in the lid while the blade runs. The steady stream creates smooth blending without separating.
After use, twist off the bowl and lid for the dishwasher. Rinse the blade by hand under running water, brushing between the edges with a small brush. Wipe the motor base with a damp cloth and store the spatula in a drawer.

Pros & Cons
Pros
- One-hand press operation makes it faster to chop mid-recipe than pulling out a knife and cutting board.
- Compact 3-cup size fits in a drawer or small cabinet, unlike bulky 10-cup processors that dominate counter space.
- Over 36,000 buyers rate it 4.6 stars, with most praising reliable performance on onions, garlic, and baby food.
- Dishwasher-safe components cut cleanup time to under a minute after chopping messy ingredients like cilantro or nuts.
Cons
- The 3-cup capacity is too small for batch cooking or large family meals — you will need to chop in multiple rounds.
- No variable speed control or pulse precision, so delicate tasks like coarse salsa or chunky guacamole require careful timing.
Details
This is a compact electric chopper designed to replace knife work for everyday ingredients like onions, garlic, herbs, and nuts. It solves the problem of tedious hand-chopping without requiring a full-size food processor.
The 350-watt motor and stainless steel blades handle dense vegetables and hard nuts in under 10 seconds. The oil dispenser in the lid lets you add olive oil while blending to emulsify homemade vinaigrettes or hummus in one step.
The body is lightweight plastic with a 3-cup BPA-free bowl and a hideaway cord that stores inside the base. It weighs under 2 pounds and fits in a standard kitchen drawer.
The press-lid design has no speed settings, so you control texture only by how long you press — fine for mincing garlic but less precise for chunky salsas or coarse nut mixtures.
Best for singles, couples, or anyone who preps small batches daily and values fast cleanup over multi-speed versatility.
How to Use
Place ingredients in the bowl, leaving room at the top for movement. Press the lid with steady pressure until you reach your desired texture, then release immediately to stop the blades.
For emulsions like mayo or dressing, start chopping dry ingredients first, then slowly drizzle oil through the lid dispenser while pressing. The vortex pulls oil into the mixture for smooth blending.
After use, unplug the base and twist the blade off the center post. Rinse large chunks under the tap before loading the bowl, lid, and blade into the dishwasher top rack.
About These Recommendations
The technique above is the point of this guide; the products are here because they help. We have not tested them ourselves — we did not buy or use this gear. The recommendations come from comparing specifications and materials against the patterns in verified owner reviews, so treat them as a shortlist worth researching rather than a verdict from our own kitchen.
Availability and prices change often, so check the current listing before buying. We earn a commission on purchases made through links on this page, which never affects what we recommend.


Write Your Review
No reviews yet. Be the first to share your experience!