

HomeWhisk earns commission from qualifying purchases made through links on this page. We research picks from specifications and owner reviews; we do not test products ourselves.
TL;DR — How to maintain a cutting board is mostly about method: use the right touch, avoid shortcuts that damage the tool, and build the habit into normal kitchen cleanup. When this turns into a purchase decision, compare best cutting board, best baking sheets, and best kitchen scale before narrowing your shortlist.
The HomeWhisk approach is research-first: compare construction, usability, cleaning, and long-term complaints before recommending a direction. For baking tools, sizing, material, accuracy, cleaning, and storage usually decide whether a tool stays useful or gets replaced.
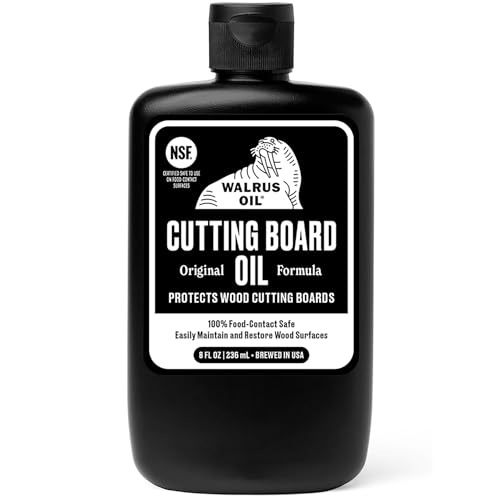
Pros
- Four-ingredient formula of beeswax, fractionated coconut oil, mineral oil, and vitamin E with nothing undisclosed.
- Trusted by professional woodworkers for finished wood surfaces, not just kitchen boards.
- Blended and bottled in the USA under FDA food-contact compliance.
- Works across cutting boards, butcher blocks, salad bowls, and wooden utensil handles.
Cons
- Beeswax content means it needs a warm room and a bit of rubbing to spread evenly on cold, thirsty wood.
- An 8 oz bottle goes quickly if you are reviving a large, badly dried-out butcher block that soaks up several coats.
A conditioning oil for wood cutting boards and butcher blocks, made to stop the drying, graying, and cracking that follows repeated washing.
The beeswax and fractionated coconut oil blend penetrates the grain and dries to a low-sheen barrier, so cutting surfaces resist water and juices instead of drinking them in.
Ships as an 8 oz bottle. Simple ingredient list of beeswax, fractionated coconut oil, pure mineral oil, and vitamin E, FDA compliant for food-contact surfaces.
Thick beeswax content spreads harder in a cold kitchen, and a neglected block may absorb two or three coats before it holds an even finish.
Best for owners of end-grain butcher blocks and wood boards who want one bottle that handles boards, bowls, and utensil handles.
Wash and dry the board fully before oiling. Trapped moisture blocks absorption and leaves patchy spots where the oil never sinks in.
Apply a thin layer with a cloth, working with the grain. Let it soak in, then wipe off anything still sitting on the surface and let it dry.
Re-oil monthly for daily-use boards, or whenever water stops beading and the wood looks pale. New or freshly sanded boards need several coats up front.

Pros
- The natural wax blend adds water resistance that straight mineral oil does not deliver.
- Twelve fluid ounces treats a large butcher block counter several times over before it runs out.
- Works across hardwood, bamboo, bowls, and utensils, covering every wood item in a kitchen.
- Deepens grain color and leaves a low sheen finish without a tacky surface.
Cons
- It is maintenance, not a one time fix, and boards washed daily need reapplication every few weeks.
- The wax blend absorbs more slowly than plain mineral oil, so the board has to rest before you cut on it.
A conditioning blend of food grade mineral oil, beeswax, and carnauba wax for wood kitchen surfaces. It replaces the oils that dish soap and repeated washing strip out of cutting boards and butcher block counters.
The wax content is the differentiator. It leaves a water resistant barrier so raw meat juices and citrus bead up rather than soaking into open grain.
Twelve fluid ounce bottle, rated for hardwood, bamboo, salad bowls, and wooden spoons. Coverage is generous, so a standard board takes a small pour and a full counter still leaves plenty behind.
One honest limit: this is maintenance, not repair. Deep knife scars and existing cracks need sanding first, since the oil darkens damage rather than closing it.
Best for owners of end grain butcher block, bamboo boards, or wooden utensils who want a single bottle to maintain all of them.
Wash and dry the board completely before applying. Coating a damp surface traps moisture under the wax and leaves cloudy patches in the finish.
Wipe on a heavy coat with a cloth, moving with the grain, and let it sit so the wood pulls it in. Buff off all excess before the next use.
New or badly dried boards need several coats spaced out. After that, reapply whenever water stops beading and the surface starts to look pale or chalky.

Pros
- Made without silicone, solvents, or harsh additives, so nothing questionable soaks into porous end grain.
- Works across bamboo and hardwood, which matters if your kitchen has a mix of board materials.
- Made in the USA from globally sourced ingredients.
- The wax content leaves a longer lasting barrier than plain mineral oil applied on its own.
Cons
- Wax-blended conditioners need a longer soak and a firm buff to avoid a tacky film, so application takes more effort than pouring on straight oil.
- This is maintenance, not repair, and it will not lift deep knife scarring or existing cracks out of a neglected board.
A food grade conditioner for wood kitchen surfaces that dry out from washing, solving the cracking and staining that ruins boards.
The mineral oil feeds thirsty grain while organic beeswax and carnauba wax seal the surface, slowing moisture loss between applications.
Formulated without silicone, solvents, or harsh additives, and made in the USA. Works on hardwood boards, butcher blocks, bamboo, bowls, and utensils.
It maintains wood rather than repairing it, so badly cracked or deeply gouged boards need sanding first.
Best for anyone maintaining a wood or bamboo board they want to keep for years.
Wash and dry the board completely first. Applying conditioner over trapped moisture seals water into the grain instead of keeping it out.
Spread a thin coat with a cloth, working with the grain. Let it soak in, then buff off the excess so the surface feels smooth and not sticky.
Recondition when water stops beading and soaks in instead, typically monthly for daily-use boards and after any deep clean or sanding.

Pros
- Purpose-built for high carbon steel, making it one of the few boards that actively protects an expensive knife investment.
- Made in Japan with consistent construction and no seams or glue lines to split.
- Odor resistant and quick to clean between proteins and produce.
- Offered in seven sizes from Small to XXX-Large, so you can match the board to your counter and cutting habits.
Cons
- The soft LDPE scars more visibly than hard plastic, so heavy daily use will leave knife tracks across the surface.
- It carries a premium price for a plastic board, and it is not dishwasher friendly or suited to heavy cleaver work.
A Japanese-made cutting board engineered to stop hard surfaces from dulling and chipping high carbon steel knife edges.
The soft LDPE deck compresses slightly at the point of contact, absorbing impact so the edge sinks in rather than bouncing back against it.
Medium measures 17.3 by 9.8 by 0.8 inches, thick enough to stay flat and heavy enough not to slide during long prep runs.
The soft material shows knife marks faster than dense polyethylene, and it should not go through a dishwasher cycle.
Best for home cooks and chefs who own Japanese carbon steel knives and want to protect that edge.
Wash by hand with warm water and mild dish soap, then towel dry. Keep it away from the dishwasher and any heat source, since LDPE warps at high temperatures.
Skip bleach soaks and abrasive scouring pads. They roughen the soft surface and shorten its working life. A soft sponge lifts fish and garlic residue on its own.
Deep knife grooves can be sanded flat with fine grit paper to restore an even cutting surface. Store the board upright so both faces dry fully.
Maintaining a Cutting Board: The Essentials
Keeping a cutting board in good working order comes down to catching small problems before they become permanent. Most issues — rust on bare steel, and warping in a hot oven — are reversible early and costly once ignored, so routine attention beats a rescue job.
Step By Step
1. Inspect the cutting board for early signs of finishes that scratch off. 2. Address the root cause, not just the symptom — usually a lapse in hand-washing to protect the finish. 3. Restore the working surface or mechanism with the gentlest effective method. 4. Fold avoiding thermal shock into your routine so the problem does not return.
Common Mistakes To Avoid
The usual failure is treating a durable baking tool as indestructible. Harsh shortcuts lead to rust on bare steel, and uneven browning. Do not assume pricier gear removes the need for care, either — technique matters more than the badge. Start your shortlist with best cutting board, best baking sheets, and best kitchen scale before narrowing by budget.
What You Will Need
Keep it simple: the baking tool itself, a clean workspace, and any basic supplies the material calls for. Set up before you start so you are not improvising mid-task.
How To Know You Did It Right
The result should be practical and repeatable: the baking tool should work cleanly, feel controlled, and show no signs of warping in a hot oven. If the same issue returns quickly, the cause is usually a missed care step — not the tool itself.
Before You Start
Match the method to the baking tool in front of you. Maintain a cutting board is not hard, but the details matter — the wrong approach to avoiding thermal shock can shorten the life of otherwise good baking gear. For product picks, compare best cutting board, best baking sheets, and best kitchen scale.
Related Product Guides
If this topic is part of a buying decision, these are the HomeWhisk guides most closely tied to it:
- best cutting board
- best baking sheets
- best kitchen scale
- best dutch oven for bread baking
- best mixing bowls
- best food storage containers
Frequently Asked Questions
What is the right way to maintain a cutting board?
Keeping a cutting board in good working order comes down to catching small problems before they become permanent. Do it consistently and you avoid finishes that scratch off.
Is a premium baking tool worth it?
Only if you use it enough to notice better control, durability, or cleanup regularly. Occasional users are well served by a mid-range pick like those in best kitchen scale.
What gear pairs well with it?
Start with a reliable core piece, then add as needs appear. Compare best cutting board, best baking sheets, and best kitchen scale for related choices.
How do I keep it in good shape?
Build lining with parchment, and storing flat to prevent bending into normal cleanup. Light, consistent care prevents batter that sticks far better than occasional deep effort.
What should I avoid?
Avoid buying by brand alone, ignoring drying fully before storage, and oversizing for your space. Each invites batter that sticks down the line.
The Bottom Line
For most home cooks, the best choice is the one that removes friction without adding maintenance you will ignore. Start with your use case, then cross-check best cutting board, best baking sheets, and best kitchen scale.
{“@context”:”https://schema.org”,”@type”:”FAQPage”,”mainEntity”:[{“@type”:”Question”,”name”:”What is the right way to maintain a cutting board?”,”acceptedAnswer”:{“@type”:”Answer”,”text”:”Keeping a cutting board in good working order comes down to catching small problems before they become permanent. Do it consistently and you avoid finishes that scratch off.”}},{“@type”:”Question”,”name”:”Is a premium baking tool worth it?”,”acceptedAnswer”:{“@type”:”Answer”,”text”:”Only if you use it enough to notice better control, durability, or cleanup regularly. Occasional users are well served by a mid-range pick like those in best kitchen scale.”}},{“@type”:”Question”,”name”:”What gear pairs well with it?”,”acceptedAnswer”:{“@type”:”Answer”,”text”:”Start with a reliable core piece, then add as needs appear. Compare best cutting board, best baking sheets, and best kitchen scale for related choices.”}},{“@type”:”Question”,”name”:”How do I keep it in good shape?”,”acceptedAnswer”:{“@type”:”Answer”,”text”:”Build lining with parchment, and storing flat to prevent bending into normal cleanup. Light, consistent care prevents batter that sticks far better than occasional deep effort.”}},{“@type”:”Question”,”name”:”What should I avoid?”,”acceptedAnswer”:{“@type”:”Answer”,”text”:”Avoid buying by brand alone, ignoring drying fully before storage, and oversizing for your space. Each invites batter that sticks down the line.”}}]} {“@context”:”https://schema.org”,”@type”:”ItemList”,”numberOfItems”:5,”itemListElement”:[{“@type”:”ListItem”,”position”:1,”url”:”https://www.amazon.com/dp/B074QVDKYC?tag=homewhisk06-20″},{“@type”:”ListItem”,”position”:2,”url”:”https://www.amazon.com/dp/B001ESTA30?tag=homewhisk06-20″},{“@type”:”ListItem”,”position”:3,”url”:”https://www.amazon.com/dp/B0GLHYSYHF?tag=homewhisk06-20″},{“@type”:”ListItem”,”position”:4,”url”:”https://www.amazon.com/dp/B00N9CASQW?tag=homewhisk06-20″},{“@type”:”ListItem”,”position”:5,”url”:”https://www.amazon.com/dp/B09MMMKLZF?tag=homewhisk06-20″}]}





Write Your Review
No reviews yet. Be the first to share your experience!