


HomeWhisk earns commission from qualifying purchases made through links on this page. We research picks from specifications and owner reviews; we do not test products ourselves.
TL;DR — Unplug and cool the air fryer, then wash the basket and tray in warm soapy water (most are dishwasher-safe but hand-washing lasts longer), wipe the interior and heating element with a damp cloth, and dry everything fully before reassembling. Clean the basket after every use and do a deeper interior clean weekly. The HomeWhisk team compiled this from manufacturer care instructions and aggregated owner feedback. The two mistakes that ruin air fryers — abrasive scrubbers that scratch the nonstick, and letting grease bake onto the heating element — are both easy to avoid.
The HomeWhisk editorial team researches kitchen equipment by analyzing manufacturer specifications, material guidance, and aggregated user reviews from major retailers and cooking communities. This cleaning guide reflects common manufacturer care instructions, not personal testing.
Air fryers cook by blasting hot air over food, which means grease and crumbs spray around the basket and up toward the heating element. Left uncleaned, that residue smokes, smells, and shortens the appliance’s life. Here’s how to clean it properly and safely. For choosing a model that’s easy to clean, see our best air fryer guide.
Pros & Cons
Pros
- Specially formulated for air fryers, microwaves, and conventional ovens.
- Fume-free performance makes appliance cleaning more comfortable in the kitchen.
- The trigger spray supports controlled application with less product waste.
- Biodegradable formula is suitable for regular cleaning and maintenance.
Cons
- Heavily baked-on residue may still require scrubbing after application.
- The listing provides few specifications beyond the 24 oz bottle size.
Details
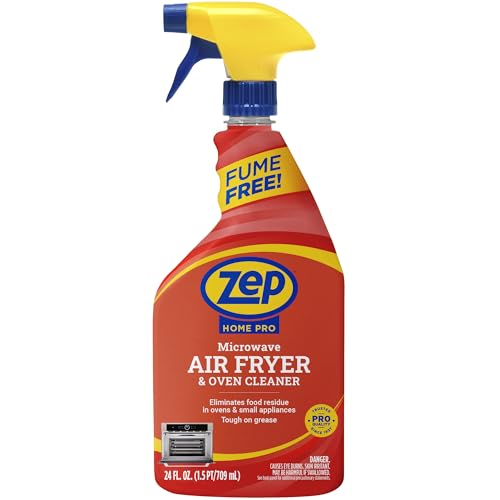
Zep Home Pro Air Fryer & Microwave Cleaner is a 24 oz spray designed to remove baked-on grease and food residue from common kitchen appliances.
Its fume-free formula tackles tough buildup without harsh or unpleasant fumes, while the trigger sprayer helps target dirty areas.
The 24 oz bottle is sized for repeated appliance maintenance, and the spray format supports controlled coverage during routine cleanup.
It may not eliminate heavy, hardened residue without additional scrubbing, and the listing gives limited material and size details.
Best for cooks who regularly clean air fryers, microwaves, and ovens with one biodegradable spray.
Best Uses
Use it for grease and food residue inside air fryers, microwaves, and conventional ovens where buildup makes routine cleaning more difficult.
Apply the trigger spray precisely to targeted areas to control coverage instead of coating the entire appliance unnecessarily.
For stubborn baked-on residue, allow the cleaner to do the main work, then scrub as needed for a cleaner surface.
Before You Start: Safety and Timing
A few basics prevent damage and injury, so start here every time.
Always unplug the air fryer and let it cool completely before cleaning. The heating element and basket stay hot well after cooking, and cleaning a plugged-in appliance risks electric shock. Give it 20-30 minutes to cool, or clean it later once it’s fully cold.
Never submerge the main unit in water. The base contains the heating element and electronics — it must never go in the sink or dishwasher. Only the removable parts (basket, tray, pan) touch water. The main body gets wiped, never soaked.
Clean sooner rather than later. Residue wipes off easily when fresh but bakes into a stubborn, smoke-producing crust if left through several cooking cycles. A quick clean after each use is far easier than a deep scrub later. This timing is the single biggest factor in keeping the job easy.
Check your model’s manual for any specific warnings, but these three rules apply to virtually every air fryer.
Everyday Clean: The Removable Parts
After each use, the basket and any tray or pan need washing. This is the routine clean that takes two minutes.
1. Remove the basket and tray/crisper plate. These are the parts that touch food and collect grease. Most detach easily by pulling out and, for the crisper plate, releasing a clip or lifting it free.
2. Wash in warm, soapy water. Use a soft sponge or dishcloth and dish soap. Most air-fryer baskets have a nonstick coating, so use only non-abrasive tools — no steel wool, no scouring pads, no gritty powders, which scratch the coating and shorten its life. For stuck-on bits, soak the basket in warm soapy water for 10-20 minutes to loosen residue, then wipe away.
3. Dishwasher option. Many baskets and trays are dishwasher-safe (check your manual), which is convenient. However, repeated dishwasher cycles wear the nonstick coating faster than gentle hand-washing, so if you want the basket to last, hand-wash it. If you do use the dishwasher, place parts on the top rack.
4. Dry completely before putting parts back, to prevent water spots and any moisture reaching the electronics.
Doing this after every use prevents the grease buildup that causes smoking and odor.
Deep Clean: Interior and Heating Element
Weekly (or whenever you see buildup), clean the interior and the heating element — the parts most people neglect, and the source of most air-fryer smoke and smell.
The interior chamber: with the basket removed and the unit unplugged and cool, wipe the inside walls with a damp cloth or sponge and a little dish soap. Grease spatters onto these walls during cooking. Wipe them down and dry with a clean cloth.
The heating element (the coil at the top of the chamber): this is where grease and crumbs bake on and cause smoke. Turn the unit upside down or tilt it to see the element clearly (still unplugged and cool). Wipe it gently with a damp cloth or a soft brush. For baked-on grease, use a paste of baking soda and a little water, apply with a soft brush or cloth, gently scrub, then wipe clean with a damp cloth. Never use metal tools on the element. Let it dry fully before use.
For lingering odors: wiping the interior with a cloth dampened in a mix of water and a little white vinegar helps cut grease and neutralize smells. Some owners run the empty air fryer for a couple of minutes after cleaning to dry the element and burn off any residual cleaning moisture.
A clean element and chamber mean no smoke, no burnt smell, and better-tasting food.
Handling Grease, Smoke, and Stubborn Residue
A few specific problems come up often. Here’s how to handle each.
Smoking during cooking usually means grease has built up on the heating element or in the drawer from previous cooks, or you’re cooking very fatty food. Clean the element and interior (above). For fatty foods (bacon, sausage, well-marbled meat), add a tablespoon of water to the bottom drawer before cooking — it stops rendered fat from overheating and smoking.
Baked-on, stubborn residue on the basket responds to a soak: warm water plus dish soap for 15-30 minutes loosens almost anything, after which it wipes off. For tougher spots, a baking-soda paste and a soft brush works without scratching. Avoid the temptation to use a knife, metal scraper, or abrasive pad — they scratch the nonstick and create spots food sticks to permanently.
Grease smell that won’t leave often lives in the element and crevices. A thorough element clean plus a vinegar-water wipe of the interior usually solves it. Cutting a lemon and running the (cleaned) unit briefly, or wiping with vinegar solution, helps neutralize persistent odors.
The golden rule throughout: no abrasives, no metal tools, no submerging the base. Almost every ruined air fryer basket comes from a scouring pad, and almost every persistent smoke problem comes from a neglected heating element.
Frequently Asked Questions
How often should I clean my air fryer?
Clean the basket and tray after every use — grease and crumbs wipe off easily when fresh but bake into stubborn, smoke-producing residue if left. Do a deeper clean of the interior chamber and heating element weekly, or whenever you notice buildup, smoke, or odor. This two-tier routine (quick basket clean always, deep clean weekly) keeps the appliance working well and prevents the grease accumulation that causes most problems.
Can I put my air fryer basket in the dishwasher?
Many air-fryer baskets and trays are dishwasher-safe — check your manual to confirm. However, repeated dishwasher cycles wear the nonstick coating faster than gentle hand-washing because of the harsh detergent and heat. If you want the basket to last as long as possible, hand-wash it in warm soapy water with a soft sponge. If you do use the dishwasher, put the parts on the top rack.
Why is my air fryer smoking?
Usually grease buildup on the heating element or in the drawer from previous cooks, or cooking very fatty foods. Clean the heating element and interior chamber thoroughly to remove baked-on grease. When cooking fatty foods like bacon, add a tablespoon of water to the bottom drawer to stop rendered fat from overheating and smoking. Persistent smoke almost always traces back to a dirty element.
How do I clean the heating element of an air fryer?
Unplug the unit and let it cool, then tilt or invert it to access the element (the coil at the top of the chamber). Wipe it gently with a damp cloth or soft brush. For baked-on grease, apply a paste of baking soda and water with a soft brush, gently scrub, and wipe clean with a damp cloth. Never use metal tools or abrasives on the element, and let it dry fully before use.
Can I use abrasive scrubbers on the basket?
No. Air-fryer baskets almost always have a nonstick coating, and abrasive scrubbers — steel wool, scouring pads, gritty powders — scratch it, ruining the coating and creating spots where food sticks permanently. Use only soft sponges or dishcloths. For stubborn residue, soak in warm soapy water or use a baking-soda paste with a soft brush. Protecting the coating is the key to a basket that lasts years.
How do I get rid of the smell in my air fryer?
First, do a thorough clean of the basket, interior, and especially the heating element, where grease odors linger. Then wipe the interior with a cloth dampened in a water-and-white-vinegar mix to cut grease and neutralize smells. Some owners rub the basket with half a lemon or run the cleaned, empty unit briefly to clear residual odor. Persistent smells almost always mean the element still has grease on it.
Related buying guides: best blender, best instant pot and best stand mixer.
The Bottom Line
Cleaning an air fryer is quick if you do it consistently: wash the basket and tray after every use in warm soapy water with a soft sponge, wipe the interior and heating element weekly, and dry everything before reassembling. Avoid the two coating-and-appliance killers — abrasive scrubbers and a neglected greasy element — and never submerge the base. A clean air fryer doesn’t smoke, doesn’t smell, and lasts for years. If you’re shopping for a model with dishwasher-safe, easy-clean parts, our best air fryer and best toaster oven guides flag the easiest to maintain.





Write Your Review
No reviews yet. Be the first to share your experience!