

HomeWhisk earns commission from qualifying purchases made through links on this page. We research picks from specifications and owner reviews; we do not test products ourselves.
TL;DR — How to oil a pastry mat is mostly about method: use the right touch, avoid shortcuts that damage the tool, and build the habit into normal kitchen cleanup. When this turns into a purchase decision, compare best baking sheets, best kitchen scale, and best dutch oven for bread baking before narrowing your shortlist.
The HomeWhisk approach is research-first: compare construction, usability, cleaning, and long-term complaints before recommending a direction. For baking tools, sizing, material, accuracy, cleaning, and storage usually decide whether a tool stays useful or gets replaced.


Pros
- Food-grade silicone over a fiberglass core is odorless and holds its shape through repeated oven cycles.
- Rolls or folds flat, so it slides into a drawer instead of eating cabinet space.
- The printed cookie recipe chart and gift packaging make it usable by a beginner straight out of the box.
- Dishwasher safe, so heavy butter and oil residue does not need hand scrubbing.
Cons
- The listing quotes two heat limits, 450°F in one spec and 480°F in another, so treat the lower figure as the safe ceiling for long bakes.
- Mat dimensions are not clearly stated, so confirm the size covers your sheet pan or rolling area before ordering.
A fiberglass-reinforced silicone sheet that doubles as a rolling surface and a bake liner, replacing floured counters and disposable parchment for cookies, macarons, sourdough, and pizza.
The non-slip underside holds the mat steady during hard kneading, while the non-stick top releases wet dough and piped macaron shells without scraping or extra dusting flour.
Build is food-grade silicone over a fiberglass core at 0.7mm thick for cut and warp resistance, rated -40°F to 480°F, dishwasher safe, and it rolls or folds flat for drawer storage.
Heat ratings conflict across the listing details, with one spec citing 450°F, so stay under the lower number on long bakes. Exact mat dimensions are also unstated.
Best for home bakers who roll dough weekly and want one washable surface instead of a running parchment habit.
Lay the mat directly on a sheet pan for cookies and macarons. Silicone slows bottom browning slightly, so add a minute or two of bake time rather than raising oven temperature.
Chill dough right on the mat before rolling, since it handles temperatures down to -40°F and moves from freezer to counter without a second surface.
Keep it away from broilers and open flame, use light pressure with knives despite the thicker build, and wash off oils promptly so residue does not bake into the surface.

Pros
- Double-thickness 0.7 mm silicone holds its shape better than standard thin mats under heavy rolling.
- BPA-free food-grade silicone is odorless, and the pattern pigments stay put without bleeding into dough.
- Built-in measurement markings and conversion chart speed up recipe work.
- Large 24 by 16 inch footprint covers most standard counter workspaces.
Cons
- Very wet or high-hydration doughs still need a dusting of flour or a touch of oil to release cleanly.
- It must be rolled rather than folded for storage, and the protective film has to be removed before first use, which is easy to overlook.
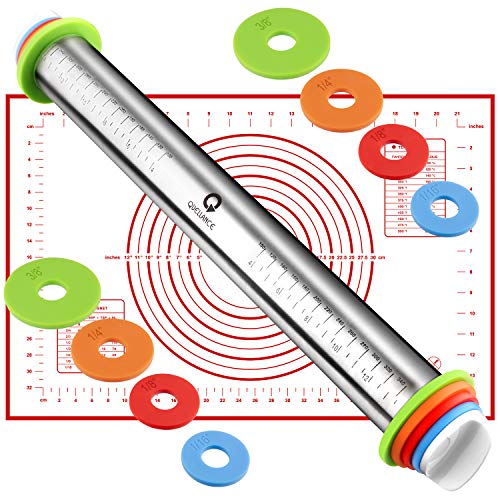
A large silicone work surface that replaces floured countertops for rolling, kneading, and shaping dough, keeping flour mess and sticking under control.
The non-stick face lets pastry and cookie dough lift away with minimal flour, while the anti-slip bottom keeps the mat anchored during hard rolling.
Food-grade BPA-free silicone at 0.7 mm thick, measuring 24 by 16 inches, with printed measurement guides and a conversion chart that resist fading.
High-hydration doughs like wet sourdough will still stick without a light dusting of flour or oil.
Best for home bakers who work with dough often and want a large, storable prep surface.
Peel off the protective film before first use. Wipe the counter dry underneath so the anti-slip backing grips fully.
Use the printed circles to size pizza bases and pie crusts, and the conversion chart to scale recipes without stopping to check measurements.
For sticky sourdough, dust lightly with flour rather than flooding the surface. Wash with warm soapy water or run through the dishwasher, then roll for storage.
Oiling a Pastry Mat: The Essentials
Oiling a pastry mat protects the surface and keeps it from drying out or corroding between uses. The trick is a light, even film — too much attracts grime and goes tacky, too little leaves the material exposed.
Step By Step
1. Clean and fully dry the pastry mat first; oil traps anything left behind. 2. Apply a few drops of a food-safe oil to a lint-free cloth. 3. Rub it in along the grain or surface until evenly coated. 4. Wipe off any excess so the finish is protected, not greasy.
Common Mistakes To Avoid
The usual failure is treating a durable baking tool as indestructible. Harsh shortcuts lead to uneven browning, and finishes that scratch off. Do not assume pricier gear removes the need for care, either — technique matters more than the badge. Start your shortlist with best baking sheets, best kitchen scale, and best dutch oven for bread baking before narrowing by budget.
Keeping It That Way
Maintenance beats repair. Fold lining with parchment, hand-washing to protect the finish, and drying fully before storage into your routine and the baking tool will stay reliable for years. Neglect any one of them and you invite batter that sticks back.
Before You Start
Match the method to the baking tool in front of you. Oil a pastry mat is not hard, but the details matter — the wrong approach to skipping abrasive scrubbers can shorten the life of otherwise good baking gear. For product picks, compare best baking sheets, best kitchen scale, and best dutch oven for bread baking.
Related Product Guides
If this topic is part of a buying decision, these are the HomeWhisk guides most closely tied to it:
- best baking sheets
- best kitchen scale
- best dutch oven for bread baking
- best mixing bowls
- best cutting board
- best food storage containers
Frequently Asked Questions
What is the right way to oil a pastry mat?
Oiling a pastry mat protects the surface and keeps it from drying out or corroding between uses. Do it consistently and you avoid rust on bare steel.
Is a premium baking tool worth it?
Only if you use it enough to notice better control, durability, or cleanup regularly. Occasional users are well served by a mid-range pick like those in best dutch oven for bread baking.
What matters most for pastry mat?
Focus on measurement accuracy, sizing and volume, and release performance first. Those decide real performance; the rest is secondary. Compare best baking sheets and best kitchen scale for options that get the basics right.
What should I avoid?
Avoid buying by brand alone, ignoring skipping abrasive scrubbers, and oversizing for your space. Each invites batter that sticks down the line.
What is the bottom line?
Match the baking tool to your real habits: buy for durability if it is daily, for value and storage if it is occasional.
The Bottom Line
For most home cooks, the best choice is the one that removes friction without adding maintenance you will ignore. Start with your use case, then cross-check best baking sheets, best kitchen scale, and best dutch oven for bread baking.
{“@context”:”https://schema.org”,”@type”:”FAQPage”,”mainEntity”:[{“@type”:”Question”,”name”:”What is the right way to oil a pastry mat?”,”acceptedAnswer”:{“@type”:”Answer”,”text”:”Oiling a pastry mat protects the surface and keeps it from drying out or corroding between uses. Do it consistently and you avoid rust on bare steel.”}},{“@type”:”Question”,”name”:”Is a premium baking tool worth it?”,”acceptedAnswer”:{“@type”:”Answer”,”text”:”Only if you use it enough to notice better control, durability, or cleanup regularly. Occasional users are well served by a mid-range pick like those in best dutch oven for bread baking.”}},{“@type”:”Question”,”name”:”What matters most for pastry mat?”,”acceptedAnswer”:{“@type”:”Answer”,”text”:”Focus on measurement accuracy, sizing and volume, and release performance first. Those decide real performance; the rest is secondary. Compare best baking sheets and best kitchen scale for options that get the basics right.”}},{“@type”:”Question”,”name”:”What should I avoid?”,”acceptedAnswer”:{“@type”:”Answer”,”text”:”Avoid buying by brand alone, ignoring skipping abrasive scrubbers, and oversizing for your space. Each invites batter that sticks down the line.”}},{“@type”:”Question”,”name”:”What is the bottom line?”,”acceptedAnswer”:{“@type”:”Answer”,”text”:”Match the baking tool to your real habits: buy for durability if it is daily, for value and storage if it is occasional.”}}]} {“@context”:”https://schema.org”,”@type”:”ItemList”,”numberOfItems”:5,”itemListElement”:[{“@type”:”ListItem”,”position”:1,”url”:”https://www.amazon.com/dp/B09D81K2VG?tag=homewhisk06-20″},{“@type”:”ListItem”,”position”:2,”url”:”https://www.amazon.com/dp/B0DTQF5VRG?tag=homewhisk06-20″},{“@type”:”ListItem”,”position”:3,”url”:”https://www.amazon.com/dp/B0FX471TPR?tag=homewhisk06-20″},{“@type”:”ListItem”,”position”:4,”url”:”https://www.amazon.com/dp/B01HLBPCBW?tag=homewhisk06-20″},{“@type”:”ListItem”,”position”:5,”url”:”https://www.amazon.com/dp/B0DH2FH1FQ?tag=homewhisk06-20″}]}



Write Your Review
No reviews yet. Be the first to share your experience!